For all of you who love to bake, hand mixers are a remarkable appliance to keep in the kitchen. The market offers some advanced and easy to use options. We have reviewed some of the best available options that you might consider buying online. We recommend the Kitchenaid KHM926ER for those not constrained by budget or the Hamilton Beach (groovy name) for those a bit more budget conscious.
The below table offers a sneak-peek for the 5 selected hand mixers being reviewed in the article below. The basic elements that are the 1st to consider when selecting a hand mixer have been chosen as the parameter to differentiate.
Like any other product, the hand mixers are classified under different budget segments. They are:
- Budget or Affordable Hand Mixers – $15 to $30
- Mid-budget Hand Mixers – $30 to $70
- Premium Budget Hand Mixers – $70 to $130
| Photo | Model | Wattage | Multiple Speeds & Slow Speed | Weight & Construction | Our Rating | Current Price |
|---|---|---|---|---|---|---|
 | KitchenAid KHM926ER Empire Red 9-Speed Hand Mixer | 270 Watts | 9 Speed Soft Start | 2lbs Plastic | [amazon_textlink asin='B00CSMGN36' text='KitchenAid KHM926ER ' template='PriceLink' store='artofbaking-20' marketplace='US' link_id='88cd03cc-deb6-11e6-8d87-99954932bf15'] | |
 | Bodum Bistro Electric 5 Speed Hand Mixer, Black | 170 Watts | 5 Speed No Slow Speed Start | 4.1lbs Stainless Steel | [amazon_link asins='B00FNIGRHO' template='PriceLink' store='artofbaking-20' marketplace='US' link_id='b582a168-deb6-11e6-ac40-0b847badedc4'] | |
 | Cuisinart HM-90BCS Power Advantage Plus 9-Speed Handheld Mixer with Storage Case, Brushed Chrome | 220 Watts | 9 Speed 3 Low-Speed Start | 4.1lbs Chrome | [amazon_link asins='B003922L12' template='PriceLink' store='artofbaking-20' marketplace='US' link_id='cab36f51-deb6-11e6-8a31-9b7ccb861b4b'] | |
 | Breville BHM800SIL Handy Mix Scraper Hand Mixer, Silver | 240 Watts | 9 Speed Slow Speed Start | 4lbs Plastic | [amazon_link asins='B00XBOXUWC' template='PriceLink' store='artofbaking-20' marketplace='US' link_id='d9c0211c-deb6-11e6-866a-9767d9a244fb'] | |
 | Hamilton Beach 62695V Power Deluxe Hand Mixer | 275 Watts | 6 Speed Special Low Speed | 3.5lbs Stainless Steel | [amazon_link asins='B00N3L2AN8' template='PriceLink' store='artofbaking-20' marketplace='US' link_id='e95ae125-deb6-11e6-8300-ffc8850e2f3f'] |
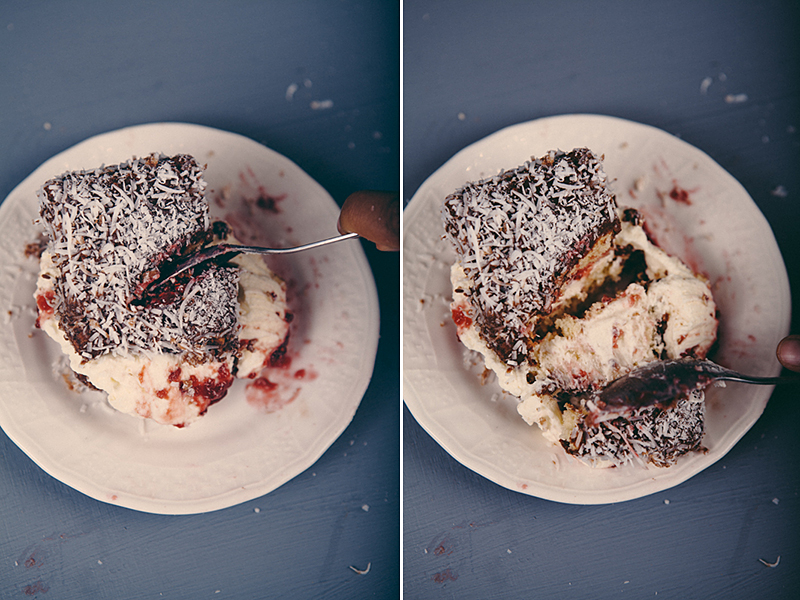
We love a good handmixer
If you are like us and love to bake, an essential appliance that can come to your rescue is a hand mixers. These are specially designed products that facilitate the need of whipping up the cream and creating fluffy meringues. These are not only among the most recommended products for the beginners but are a favorite among the most popular chefs too. Presently, the market has a stack of options when it comes to a hand mixer. They are meant to be used for the same purpose but each of them come with a distinct feature of their own. While some have been priced high owing to the advanced features they support, there are some basic hand mixers that do the job equally well. Before we try to evaluate the best available mixers in the market, it would be a wise idea to understand the specifics as well as important aspects to consider when buying a hand mixer.
Low-budget affordable options solve the purpose, but most of these are built with cheap materials. Hence, cheaper options have a shorter lifespan and if you use a hand mixer on a regular basis, then its worth opting for pricier options. In respect of usage, a mixer is often used for whipping up eggs, making mayonnaise or carrying out similar operations. A more strenuous operation like the mixing of bread dough is also something a mixer is capable of doing. Hence, before making a purchase it would be wise to shortlist the things you would be using it for.
Tips to select the best hand mixer for your need
The following guide is intended to offer you a guideline to select the perfect hand mixer that suits your requirements. Although each of them would do the same task, there are various things that separate each of these from the other.
- Read Reviews: Going online and searching for the best hand mixers that are currently available in the market is the 1st thing to do. With so many options, it is certainly impossible to understand the one to go for. Reputed and unbiased reviews by experts offer insights on the features, quality, usability, value for money, serviceability, and much more. The key things to consider while reading such reviews include:
- A comfortable Grip
- Study Parts that would last
- Variable Speed Control
- Watt Rating of the product
While it is really important to have a product that grips well to ensure you perform the task easily, variable speed control and sturdy parts contribute towards its functionality and the aspect of longevity. The other factor of considering is the wattage as it measures the power used by these machines. Choosing a machine with a high watt means that the machine would do most of the work as compared to your wrists and vice versa.
- Budgets: The next thing to consider before you finalize an option would be to select a budget. Yes, it is difficult to decide upon a budget, but it gives you a rough idea and helps to cut down the number of options that you might come across. There are both cheap and expensive options that are there on offer, but it is always advisable to select a standard mid-budget mixer to ensure that it does the job effectively and lasts for considerable number of years. Choosing the cheapest options would basically be good if you are whipping light food items like mayonnaise or cream. However, when it comes to fruit cakes and bread dough, it is advised to opt for a high wattage machine. It all comes down to the price you pay for the machine, hence if you can afford, always go for a machine that is made up of good quality materials and is of a high wattage.
- Branded or Non–Branded Products: This is a common question that comes to the mind of virtually every customer. Although, it is important to consider a branded stand mixer, it is not that important in the case of a hand mixer. The market currently features hundreds of brands featuring high-performance hand mixers. When you are on a budget, it is the features and the period of warranty that would matter the most. On the contrary, if you are looking for something that comes with exceptional design and more than the basic features, it is better to choose one of the branded alternatives. In either case, it will always be a good idea to go through an in-depth review of the options you are about to purchase.
- Hand Mixers with storage cases: This is certainly something you might want to consider. A hand mixer that comes with a storage case makes sure that you can keep all its accessories in a single place and in an organized manner. However, this is just an option that is available with some of the popular variants.
- Hand Mixers with dough hook: Many of the average powered hand mixers come fitted with a dough hook. This means that it would not be able to handle bread dough despite trying. Hence, in case you are searching for something that is flexible, then it is better to opt for a hand mixer that is fitted with a powerful motor and comes with a whisk attachment.
5 Best Hand Mixers for Baking
KitchenAid KHM926ER Empire Red 9-Speed Hand Mixer
 The KitchenAid KHM926ER 9-speed hand mixer comes with an exclusive accessory pack offering endless opportunities. The exclusive accessory pack offers 2 stainless steel turbo beaters, 2 stainless steel dough hooks, a storage bag, a blending rod, and a stainless steel pro whisk. The product can be used for kneading, mixing, blending, whipping, etc. It comes fitted with a lockable swivel cord that can be locked on either right or left side of this mixer. KitchenAid KHM926ER comes in different color options that include Empire Red, Candy Apple Red, Onyx Black, Contour Silver, and White.
Budget Segment: Premium
Pros
- Can be easily operated using a single hand
- Comes with a storage bag that helps you to keep all its accessories in an organized manner.
- Portable and light weight i.e. only 2lbs
- Vibrant LCD display offering a perfect view of the current settings
- Soft Start facilitating slow start with virtually no noise at all
- Exclusive accessory pack that includes highly useful stainless steel attachments
- Soft Grip handle offers adequate comfort when mixing
- Easy and quick removal of accessories by the press of a button
- Powerful wattage facilitates minimal pressure from hand
- Lockable swivel cord helps in approaching the ingredients from all angles
Cons
- Expensive and priced around $100
- Comes with only a 1-year warranty
- High on Maintenance
Bodum Bistro Electric 5 Speed Hand Mixer, Black
 The Bodum Bistro Electric hand mixer is powered by 170 Watts motor is built to handle anything from whipping cream to mashing potatoes. It is a 5-speed hand mixer and is made from a combination of stainless steel, rubber, silicone and plastics. There are 2 interchangeable attachments coupled with a built-in retractable cord compartment. Presently, the company offers them in 3 different colors i.e. orange, black, red, white and green. The finishing of the outer layers gives it a smooth and protected look that ensures there are reduced chances of it being damaged.
Budget Segment: Mid-budget
Pros
- Rubberized grip-enhancing exteriors that make sure that it doesn’t slip out of the hands easily.
- 3 Multipurpose attachments facilitates easy mixing of both wet and dry ingredients
- 2-year warranty with an option to extend up to 4 years via 4-year protection
- In-built hidden cord storage backed by a fold-out crank that keeps the mixer stored in a neat manner
- Comes with a strong blender capable of beating the thickest of the dough with ease
- Attractive design and available in 5 different color options
- 170 watts and 5-speed feature requires moderate efforts with your hands
- Made of sturdy stainless steel that ensures long term usage
Cons
- No slow speed option
- Takes efforts to clean and maintain
- A bit heavy in terms of weight
Cuisinart HM-90BCS
 The Cuisinart HM-90BCS is a 9-speed hand mixer which comes fully loaded. There is a storage case that is offered with it and you can use the product it to batter, whip, mix or anything it’s built for is quite an easy task. This product also combines the aspect of functionality with a good style and ensures you do not need to sacrifice on either front. It has been given a chrome finish and made up of sturdy materials. There is a LED display that offers details about the current speed and other important settings in a single place.
Budget Segment- Mid Budget
Pros
- Powered by a 220 Watt Motor and 9-speed feature that lets you put less pressure with your hands
- LED display offers a single place ease to read screen with all important options like the speed and other settings
- Thin yet strong beaters that are not placed close to each other facilitates easy mixing of thicker batters
- Comes with a storage case that helps in keeping the product and accessory in an organized manner
- Comes with a long cord with swivels around
- At all speeds, it makes a vibrating noise and hardly any noise
Cons
- Weighs 4.1lbs making it heavier than some close alternatives in the same budget
- Lack of resting place
- Slow start feature is average as it starts with 3 speed and then comes down to 1 speed
- Dough hooks might be below expectations for some users
Breville BHM800SIL
 Another premium segment hand mixer, the Breville BHM800SIL comes with the ability to maximize the speed output for whisking as well as the power for kneading in a single piece. It is an intuitive ergonomic control mixer that adjusts the power to meet the requirements of the things you are mixing. There is the 9-speed selector as well as a boost feature. The boost feature is quite effective as it offers the extra power if needed while performing any of the operations at any preferred level. Among the accessories, it comes with 2 scrapper beaters, 2 balloon whisks, and 2 dough hooks.
Budget Segment: Premium
Pros
- 9-speed selector and boost feature is easy to use with the scroll wheel that is electronically controlled
- Spin from the scroll wheel is very effective at any speed irrespective of the load on the machine
- Comes with a well-built storage case that can easily store all the accessories along with the mixer in a single place
- Unique pause feature helps in holding the setting while you add or prepare other ingredients
- Comes with a quick release trigger and a swivel cord
- Powered by a 240 Watt Motor which is more than enough for easy whipping, mixing, and performing all the other tasks
- Easy to clean and store
- LCD readouts offers all the details about speed and setting at a single place
- Pretty sturdy and made of high-quality plastics that give it a very attractive look
- Fitted with a count-up timer offering accurate control on recipes requiring precise mixing time
Cons
- Pretty expensive compared to any of the options available
- Weight of the product is on the higher side too
Hamilton Beach 62695V Power Deluxe Hand Mixer
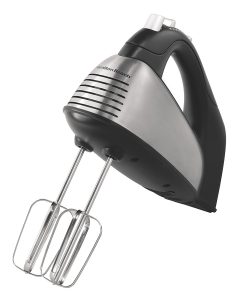 Powered by a 275 watts motor, the Hamilton Beach 62695V is a powerhouse for sure. It comes with a special low-speed feature that reduces the possibility of spatter while operation. It can withstand tough jobs and has the required power as well as versatility. The set comes with the traditional beaters, whisk, mixer, etc. The product has been made using coated materials which are both scratch resistant and durable in nature. The company offers this product in only one color option i.e. White.
Budget Segment: Starter or low budget price segment
Pros
- Installed with a bowl rest feature that minimizes all kinds of messes while ensuring you to place the mixer on the edge of a bowl
- Easily the best cost effective product for preserving your mixing bowls
- Additional button under the speed control button to offer the extra power for any speed. This comes in very handy while performing tough tasks.
- A well-designed compact case that keeps all the accessories and the product in a single place
- Slow 1st speed helps in reducing messy splatters
- Powerful 275-watt motor supported by 6 speeds
- Made from stainless steel and is pretty light weight of only 2.5lbs
- Priced in the starting segment which is affordable
Cons
- Beaters have been placed too close making a thick batter which is hard to dislodge from the beaters until it is removed from the mixer
- Takes efforts to clean and maintain
- A few complaints have stated that it comes with metal flakes that could mix with the food in the initial bursts
How to use Hand Mixers effectively?
In order to ensure that these hand mixers last for a considerable period of time and offer you the best value for the investment you made, there are a few things that you should be taking care of. They include:
- In all circumstances to avoid any kind of mess make sure you use a deep narrow bowl.
- Start operating at lower speeds whenever adding ingredients and follow it with a slow increase as it starts to mix.
- Go around the edges while keeping the mixer in motion to attain the best efficiency
- Use a rubber spatula to scrape down the bowl at frequent intervals to ensure things are mixed in the right manner.
- Lift the beaters to clean after mixing such that it remains a bit out of the batter but does not come out of the bowl. Follow this up by switching the mixer on and then scraping along the edges using a rubber spatula.
Conclusion
When it comes to hand mixers the market offers innumerable options. The above 5 are among the popular selling products online and we have tried to evaluate them with respect to important features. While a bunch of the customers would be happy to go for a budget friendly product, there is a considerable market for both mid-priced and even premium segment products.
If you are among those who prioritize in having an affordable yet powerful product then we recommend going for Hamilton Beach 62695V Power Deluxe Hand Mixer. This product has been priced around $30 and comes with a powerful 275 watt motor. However, if you are looking for something that comes with premium features besides the basic ones, looks attractive, and makes baking a delight, then either of the two options i.e. KitchenAid KHM926ER or Breville BHM800SIL is the one to go for. While both come with a 9-speed option, the soft start feature is a treat to use with the KitchenAid KHM926ER. On the contrary, Breville BHM800SIL comes with a dedicated boost feature which is an easy to use scroll wheel which is electronically controlled. It offers the extra boost at every speed at all levels.
Lastly, if you are one of those who wish to have a good looking product that comes with additional features but comes below the price of $60, then you can opt for either Cuisinart HM-90BCS or Bodum Bistro Electric. It does the all the task pretty well and is capable of handling both simple and strenuous tasks.
We hope this article has been useful for you!
Alex & Rani.